12 KiB
You can use Docker for deployment. It has several advantages like security, replicability, development simplicity, etc.
In this section you'll see instructions and links to guides to know how to:
- Make your FastAPI application a Docker image/container with maximum performance. In about 5 min.
- (Optionally) understand what you, as a developer, need to know about HTTPS.
- Set up a Docker Swarm mode cluster with automatic HTTPS, even on a simple $5 USD/month server. In about 20 min.
- Generate and deploy a full FastAPI application, using your Docker Swarm cluster, with HTTPS, etc. In about 10 min.
You can also easily use FastAPI in a standard server directly too (without Docker).
Docker
If you are using Docker, you can use the official Docker image:
tiangolo/uvicorn-gunicorn-fastapi
This image has an "auto-tuning" mechanism included, so that you can just add your code and get very high performance automatically. And without making sacrifices.
But you can still change and update all the configurations with environment variables or configuration files.
!!! tip To see all the configurations and options, go to the Docker image page: tiangolo/uvicorn-gunicorn-fastapi.
Create a Dockerfile
- Go to your project directory.
- Create a
Dockerfilewith:
FROM tiangolo/uvicorn-gunicorn-fastapi:python3.7

COPY ./app /app
Bigger Applications
If you followed the section about creating Bigger Applications with Multiple Files{.internal-link target=_blank}, your Dockerfile might instead look like:
FROM tiangolo/uvicorn-gunicorn-fastapi:python3.7

COPY ./app /app/app
Raspberry Pi and other architectures
If you are running Docker in a Raspberry Pi (that has an ARM processor) or any other architecture, you can create a Dockerfile from scratch, based on a Python base image (that is multi-architecture) and use Uvicorn alone.
In this case, your Dockerfile could look like:
FROM python:3.7

RUN pip install fastapi uvicorn

EXPOSE 80

COPY ./app /app

CMD ["uvicorn", "app.main:app", "--host", "0.0.0.0", "--port", "80"]
Create the FastAPI Code
- Create an
appdirectory and enter in it. - Create a
main.pyfile with:
from fastapi import FastAPI

app = FastAPI()


@app.get("/")
def read_root():
    return {"Hello": "World"}


@app.get("/items/{item_id}")
def read_item(item_id: int, q: str = None):
    return {"item_id": item_id, "q": q}
- You should now have a directory structure like:
.
├── app
│   └── main.py
└── Dockerfile
Build the Docker image
- Go to the project directory (in where your
Dockerfileis, containing yourappdirectory). - Build your FastAPI image:
docker build -t myimage .
Start the Docker container
- Run a container based on your image:
docker run -d --name mycontainer -p 80:80 myimage
Now you have an optimized FastAPI server in a Docker container. Auto-tuned for your current server (and number of CPU cores).
Check it
You should be able to check it in your Docker container's URL, for example: http://192.168.99.100/items/5?q=somequery or http://127.0.0.1/items/5?q=somequery (or equivalent, using your Docker host).
You will see something like:
{"item_id": 5, "q": "somequery"}
Interactive API docs
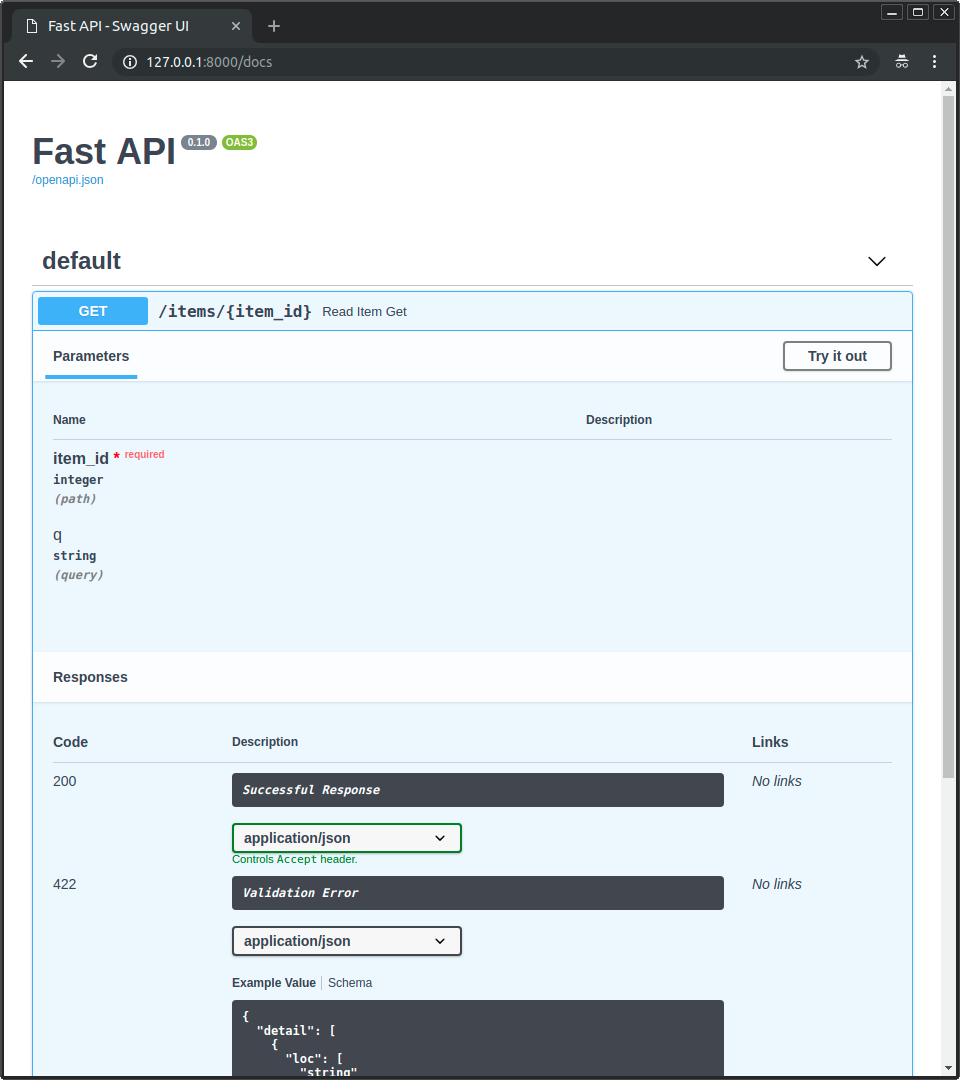
Now you can go to http://192.168.99.100/docs or http://127.0.0.1/docs (or equivalent, using your Docker host).
You will see the automatic interactive API documentation (provided by Swagger UI):
Alternative API docs
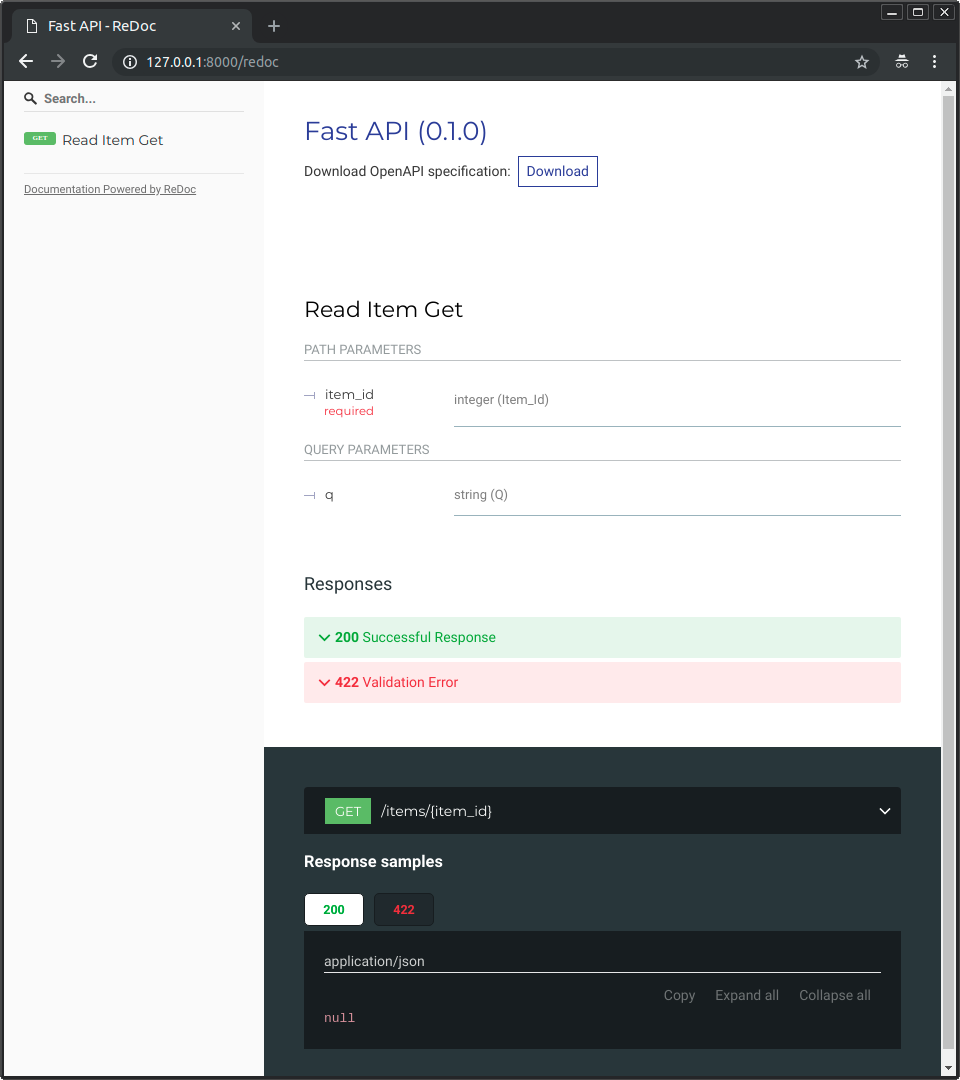
And you can also go to http://192.168.99.100/redoc or http://127.0.0.1/redoc (or equivalent, using your Docker host).
You will see the alternative automatic documentation (provided by ReDoc):
HTTPS
About HTTPS
It is easy to assume that HTTPS is something that is just "enabled" or not.
But it is way more complex than that.
!!! tip If you are in a hurry or don't care, continue with the next section for step by step instructions to set everything up.
To learn the basics of HTTPS, from a consumer perspective, check https://howhttps.works/.
Now, from a developer's perspective, here are several things to have in mind while thinking about HTTPS:
- For HTTPS, the server needs to have "certificates" generated by a third party.
- Those certificates are actually acquired from the third-party, not "generated".
- Certificates have a lifetime.
- They expire.
- And then they need to be renewed, acquired again from the third party.
- The encryption of the connection happens at the TCP level.
- That's one layer below HTTP.
- So, the certificate and encryption handling is done before HTTP.
- TCP doesn't know about "domains". Only about IP addresses.
- The information about the specific domain requested goes in the HTTP data.
- The HTTPS certificates "certify" a certain domain, but the protocol and encryption happen at the TCP level, before knowing which domain is being dealt with.
- By default, that would mean that you can only have one HTTPS certificate per IP address.
- No matter how big your server is or how small each application you have on it might be.
- There is a solution to this, however.
- There's an extension to the TLS protocol (the one handling the encryption at the TCP level, before HTTP) called SNI.
- This SNI extension allows one single server (with a single IP address) to have several HTTPS certificates and serve multiple HTTPS domains/applications.
- For this to work, a single component (program) running on the server, listening on the public IP address, must have all the HTTPS certificates in the server.
- After obtaining a secure connection, the communication protocol is still HTTP.
- The contents are encrypted, even though they are being sent with the HTTP protocol.
It is a common practice to have one program/HTTP server running on the server (the machine, host, etc.) and managing all the HTTPS parts : sending the decrypted HTTP requests to the actual HTTP application running in the same server (the FastAPI application, in this case), take the HTTP response from the application, encrypt it using the appropriate certificate and sending it back to the client using HTTPS. This server is often called a TLS Termination Proxy.
Let's Encrypt
Before Let's Encrypt, these HTTPS certificates were sold by trusted third-parties.
The process to acquire one of these certificates used to be cumbersome, require quite some paperwork and the certificates were quite expensive.
But then Let's Encrypt was created.
It is a project from the Linux Foundation. It provides HTTPS certificates for free. In an automated way. These certificates use all the standard cryptographic security, and are short lived (about 3 months), so the security is actually better because of their reduced lifespan.
The domains are securely verified and the certificates are generated automatically. This also allows automating the renewal of these certificates.
The idea is to automate the acquisition and renewal of these certificates, so that you can have secure HTTPS, for free, forever.
Traefik
Traefik is a high performance reverse proxy / load balancer. It can do the "TLS Termination Proxy" job (apart from other features).
It has integration with Let's Encrypt. So, it can handle all the HTTPS parts, including certificate acquisition and renewal.
It also has integrations with Docker. So, you can declare your domains in each application configurations and have it read those configurations, generate the HTTPS certificates and serve HTTPS to your application automatically, without requiring any change in its configuration.
With this information and tools, continue with the next section to combine everything.
Docker Swarm mode cluster with Traefik and HTTPS
You can have a Docker Swarm mode cluster set up in minutes (about 20 min) with a main Traefik handling HTTPS (including certificate acquisition and renewal).
By using Docker Swarm mode, you can start with a "cluster" of a single machine (it can even be a $5 USD / month server) and then you can grow as much as you need adding more servers.
To set up a Docker Swarm Mode cluster with Traefik and HTTPS handling, follow this guide:
Docker Swarm Mode and Traefik for an HTTPS cluster
Deploy a FastAPI application
The easiest way to set everything up, would be using the FastAPI Project Generators{.internal-link target=_blank}.
It is designed to be integrated with this Docker Swarm cluster with Traefik and HTTPS described above.
You can generate a project in about 2 min.
The generated project has instructions to deploy it, doing it takes another 2 min.
Alternatively, deploy FastAPI without Docker
You can deploy FastAPI directly without Docker too.
You just need to install an ASGI compatible server like:
- Uvicorn, a lightning-fast ASGI server, built on uvloop and httptools.
pip install uvicorn
- Hypercorn, an ASGI server also compatible with HTTP/2.
pip install hypercorn
...or any other ASGI server.
And run your application the same way you have done in the tutorials, but without the --reload option, e.g.:
uvicorn main:app --host 0.0.0.0 --port 80
or with Hypercorn:
hypercorn main:app --bind 0.0.0.0:80
You might want to set up some tooling to make sure it is restarted automatically if it stops.
You might also want to install Gunicorn and use it as a manager for Uvicorn, or use Hypercorn with multiple workers.
Making sure to fine-tune the number of workers, etc.
But if you are doing all that, you might just use the Docker image that does it automatically.

